
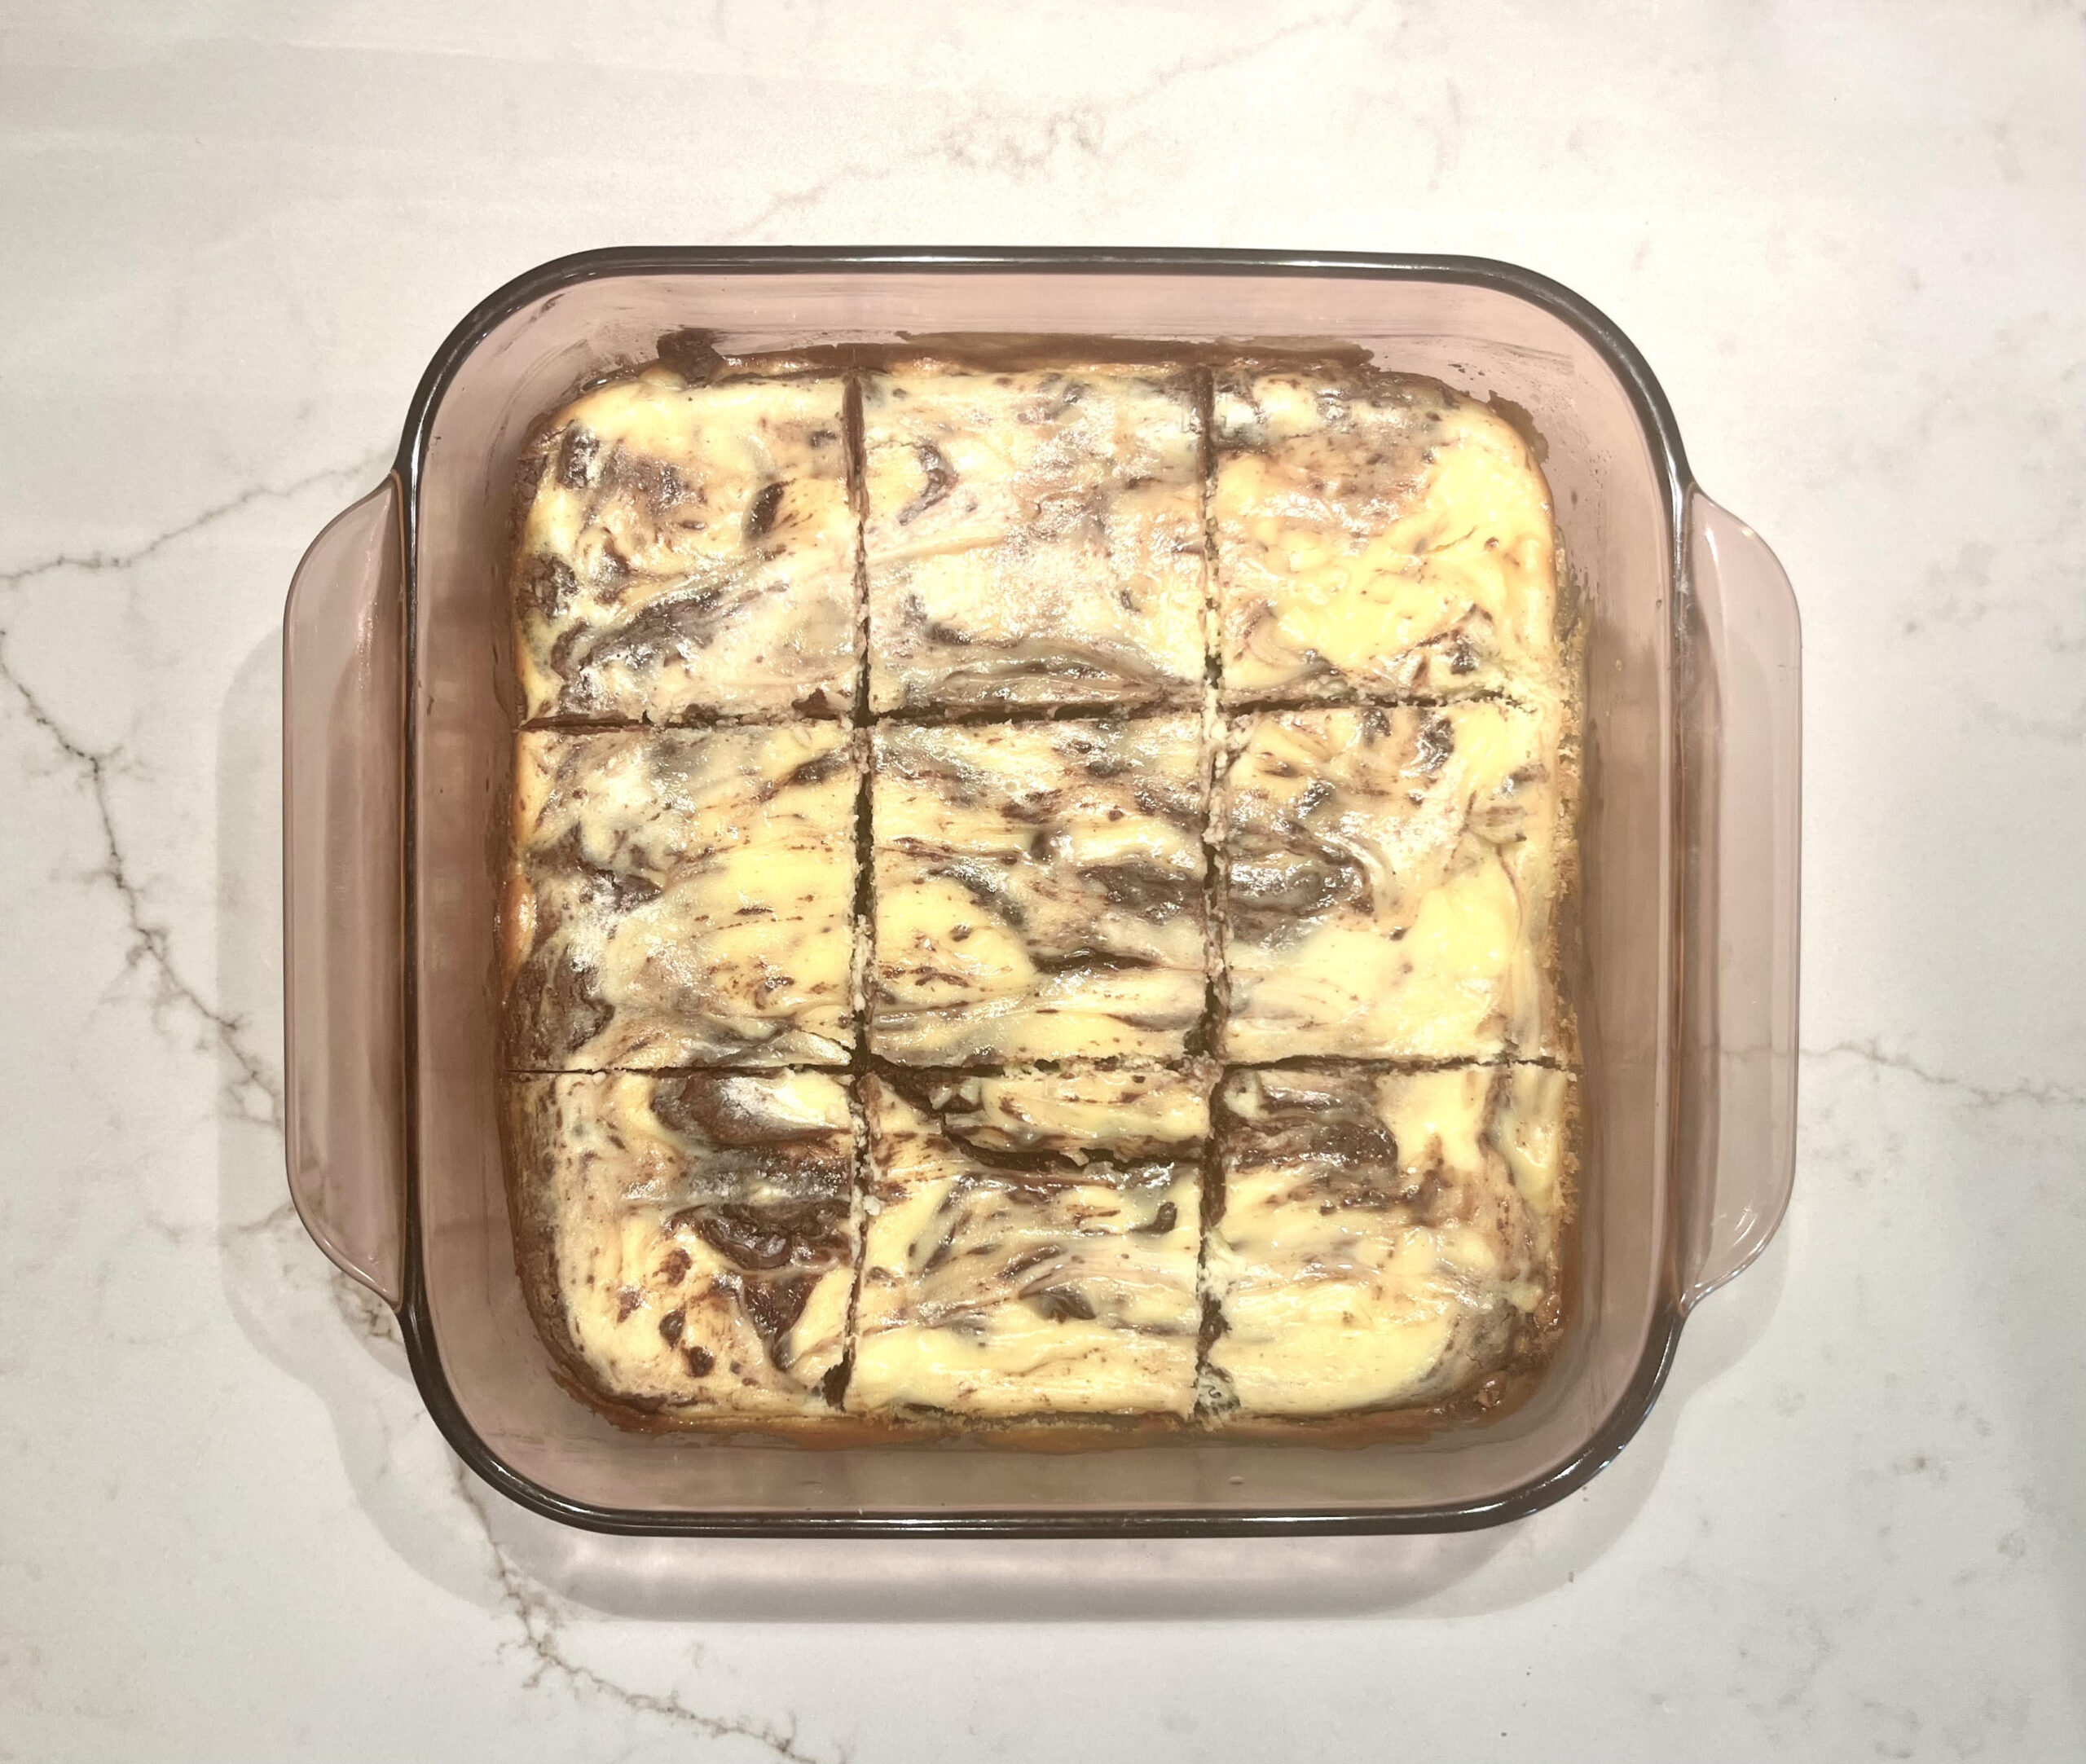
Enjoy both cheesecake and brownies in one dessert with our recipe for Cheesecake Brownies! A combination so good, you won’t miss the classics.

THE INGREDIENTS:
THE CHEESECAKE LAYER:
Cream Cheese: Cream cheese is the cheese frequently found in cheesecake, after all. It’s tangy and creamy nature makes the dessert we love. We don’t want to be light on the cream cheese here! Although too much and brownies would struggle to fully bake through, too little and it would be more like 95% brownie 5% cheesecake. With the amount we have, it feels nearly 50/50.
White Sugar: Since you might have some bites that are more cheesecake than brownie, you can’t always count on the brownies’ sweetness! ¼ cup of granulated sugar sweetens the cheesecake layer without going overboard, so cream cheese’s tanginess can really shine.
Egg: Eggs add structure and liquid to our cheesecake batter, making everything just a bit smoother. Egg yolks also come with more fat, which means more richness!
Lemon Juice: A bit more tang in a cheesecake never hurt, did it? Lemon juice is an acid, so it adds more of that acidic tang to our cheesecake. If you don’t have any lemon juice on hand, though, it is not the end of the world to omit this ingredient.
THE BROWNIE LAYER:
Butter: Butter is very important in this recipe as it allows us to bloom the cocoa powder, which gives off an even richer chocolate flavor. In addition to that, it gives a fudgier texture that an oil-based brownie would struggle to achieve. Personally, we use unsalted butter so we have full control over how much salt goes in the recipe.
Cocoa Powder: When making brownies, it is important to not just have chocolate one way. By combining cocoa powder, melted chocolate, and chocolate chips into this recipe, we ensure a triple burst of chocolate flavor. We recommend unsweetened cocoa powder as the chocolate and sugar in this recipe brings enough sweetness. For our regular brownie recipe, we do not recommend dark cocoa powder for these brownies because we felt like the strength of dark cocoa powder overwhelmed the melted chocolate and chocolate chip flavor. This recipe is a whole different story. Dark cocoa powder actually pairs well with the cheesecake layer if that is what you have on hand. So, feel free to cook your pantry out on this one.
Eggs: Egg yolks are what give that dense, fudgy texture! However, adding too many eggs leads to that cakey texture that some like in their brownies and some see as too close to chocolate cake. For this reason, we don’t recommend going any higher in the egg department.
White Sugar: For traditional brownies, white sugar is a key component for getting that classic crinkle top. However, for cheesecake brownies, the crinkle is not as important as we have a cheesecake top instead! Still, white sugar is also what makes our brownies taste sweet, not disappointing. Brown sugar, on the other hand, would have added more moisture and more flavor to cover up the chocolate. White sugar it is!
Salt: Salt is such a basic ingredient, but adding a pinch of that savory flavor really brings out the chocolate.
Flour: Flour, another basic ingredient, is important for brownies (and just about every other baked good on the planet)! We recommend using all-purpose flour for this recipe. We have not tried this recipe with any other variety of flour and cannot report on how it would affect this recipe.
Dark Chocolate Chips: Even if you are not a dark chocolate fan, we recommend using melted dark chocolate in this recipe. Due to the sweetness of this dessert overall, opting for a sweeter melting chocolate significantly reduces the chocolate flavor in this recipe.
Semisweet Chocolate Chips: These chocolate chips, on the other hand, are a mix-in! They are what provide those pockets of gooey chocolate that really bring a lot of value to a brownie. Since these chocolate chips are a mix-in, substitutions will work well here. If you really love dark chocolate, you can replace them with dark chocolate chips. Milk chocolate, white chocolate, or chocolate chunks will all work well for this brownie recipe. Just go with your favorite!
KEY INFORMATION:
Blooming Cocoa: Blooming cocoa is the very first thing you do in this recipe. First, you melt the butter in a saucepan. You only have to melt the butter, so don’t worry about making any brown butter for this recipe! Next, you add the cocoa and stir until completely incorporated. Our goal is to avoid any lumps of cocoa powder in the brownies. When the cocoa interacts with this hot liquid, it strengthens the flavor of the cocoa powder-just what we want for brownies!
Order of Addition: We’ve made these brownies many times, and a very important aspect for this recipe is that the order matters. The other dry ingredients and the eggs should be mixed first, and then the hot ingredients are added. We’ve done it the other way around before. It made the brownies less fudgy, in our opinion.
Resting the Brownies: Cheesecake brownies take a bit more time to set up than regular brownies, even if the brownies have been baked for long enough. Allow the brownies to sit out at room temperature for 30 minutes before transferring to the fridge for at least 3 hours so that everything has a chance to firm up.
Successfully Melting Chocolate: You cannot melt the butter and chocolate chips together. When the chocolate chips interact with fat while melting, they seize up and become clumpy. Instead, for a quick melt, put the chocolate chips in a microwave-safe bowl and microwave for 30 second intervals, switching to 15 second intervals if the chocolate chips are almost melted. Then, stir! This takes us 60-90 seconds to achieve.
How To Get a Smooth Cheesecake Batter: To have a smooth cheesecake batter, try to bring the cream cheese to room temperature before mixing it. The colder the cream cheese is, the more lumps will form.
Successful Swirling: Although you can just dump the cheesecake layer on top and bake the brownies, you often want a little bit of chocolate on top for that classic cheesecake brownie appearance. The method that works for us is to start by adding dollops of the cheesecake mixture on top of the brownie batter. This is about 9 large dollops. From there, get out a butterknife. Stick the knife in the brownie batter and and flip some up on each dollop of cheesecake. From there, run your knife through the batter in horizontal and vertical lines to get swirls. You may have to flip more brownie batter on top as you go, but no worries there!
How to Make Sure Both Layers Cook For Cheesecake Brownies: Before we started making our own recipes, we longed for cheesecake brownies. However, whenever we made them, the cheesecake layer would be cooked on top and the brownie layer would be dreadfully underbaked. Oftentimes, we wouldn’t eat the brownies (or we would at least avoid that soggy middle piece at all costs). The secret for brownies where both layers thoroughly cook is a little less brownie batter and a bit more pre-baking. With the cheesecake layer on top, there is more moisture and a deeper layer for the heat to push through in order to get to the center. The brownie batter cooks much slower. By taking our classic brownie recipe and ¾-ing it, we account for the extra height our cheesecake layer adds. From there, we also learned you can pre-bake brownie batter. You can even successfully swirl in the cheesecake batter later! By giving the brownies a ten minute head start, they have a chance to start cooking without the cheesecake getting in the way.
Better The Next Day: For the first day, after the chill, the brownies will be creamy. Not just the cheesecake layer, but the brownie layer, too! The next day, the cheesecake layer will remain creamy. However, the brownies will have firmed up a bit more to almost that classic brownie texture! They’ll still be a bit more creamy due to the moist cheesecake, but we love that! We also believe the flavor is almost stronger the next day.

Ingredients
Method
- Preheat the oven to 350 F / 180 C.
- In a saucepan, melt the butter.
- Add the cocoa powder to the saucepan and stir until completely incorporated.
- Take the saucepan off the heat and allow it to cool for several minutes.
- To a medium bowl, add the eggs, sugar, flour, and salt. Mix.
- In a microwave safe bowl, melt the dark chocolate chips. Microwave for 30 second intervals, stirring between each interval, until the dark chocolate chips are melted.
- Add the melted chocolate chips to the medium bowl and begin to stir.
- After a few stirs, add the butter and cocoa powder mixture. Now, mix until everything is combined.
- Mix in the semisweet chocolate chips.
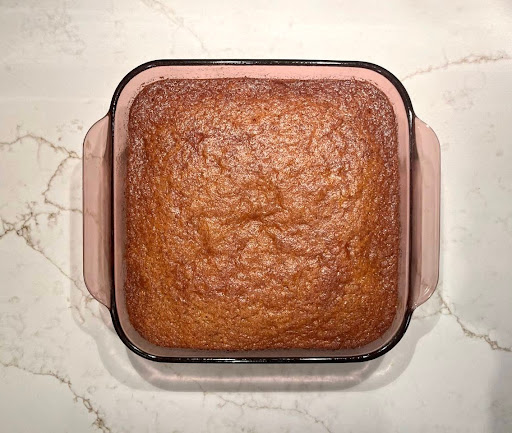
- Pour the brownie batter in a greased 9×9 baking pan.
- Bake for 10 minutes at 350 F / 180 C.
- While the brownies are baking, combine the cream cheese, white sugar, egg, and lemon juice in a bowl.
- Using a beater, beat the cream cheese mixture until the ingredients are well combined and the batter is smooth.
- After the brownies have baked for ten minutes, take them out of the oven.
- On top of the brownie layer, add the cheesecake mixture as 9 large dollops, evenly spaced.
- Get out a butterknife. Stick the butterknife into your brownie batter and flip some brownie batter on top of your cheesecake mixture. From there, run your butterknife in horizontal and/or vertical lines to make swirls. Flip up more brownie batter as needed!
- Bake at 350 F / 180 C for 30 minutes.
- Let the cheesecake brownies cool at room temperature for 30 minutes before transferring to the fridge. Let it chill at least 3 hours before serving.
- Enjoy!
Leave a Reply