
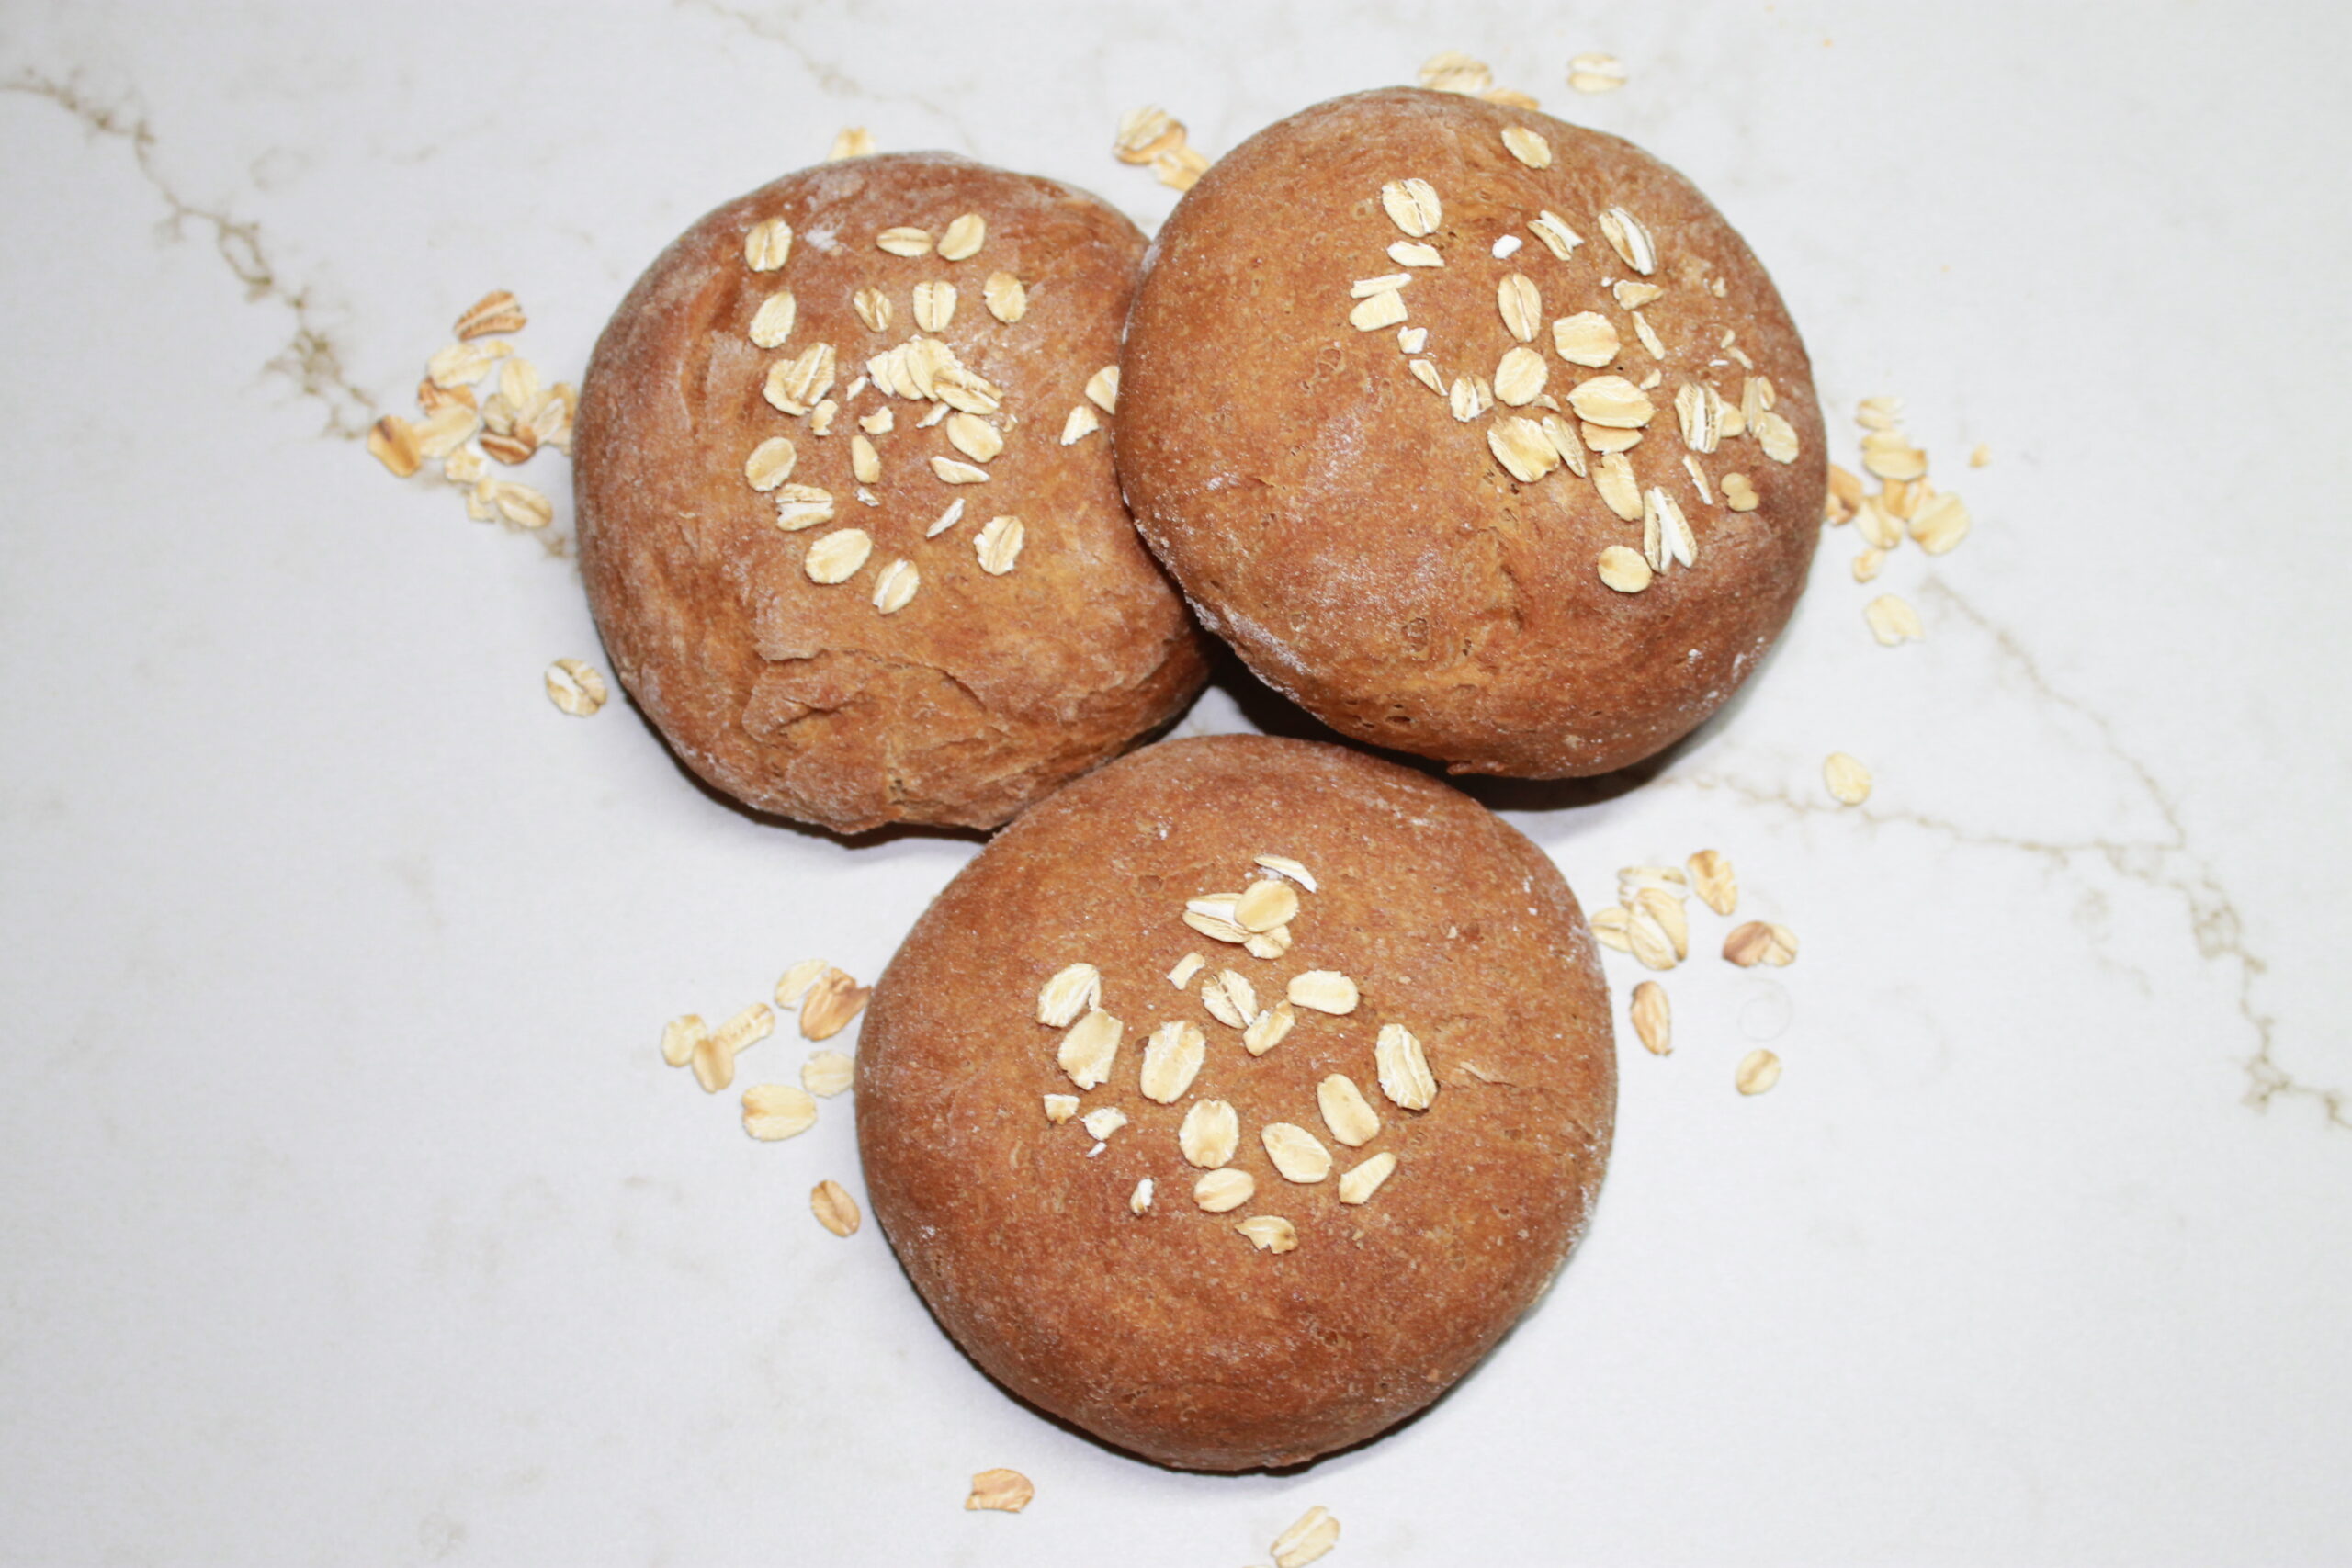
These brown bread rye rolls have been carefully tested, adjusted, and turned into the best tried-and-true recipe for flavorful dinner rolls. Plus, who knew making bread could be so easy?

THE INGREDIENTS:
Active Dry Yeast: If you want bread instead of a rock, you really do need yeast! There are two common varieties of yeast, quick yeast (aka instant yeast) and active dry yeast. Due to the long rise time on this bread, active dry yeast is best to prevent overproofing. If you only have quick/instant yeast on hand, use ¾ as much instant yeast as you would active dry yeast. By using slightly less, you help avoid the bread rising too much and getting an undesirable structure.
Water: Water has two amazing functions in this recipe! The first is to combine with our active dry yeast in order to “activate it”. Yeast is actually a microorganism! With a sugary snack and some warm water (not boiling-that will kill the yeast), it begins to activate and froth. If nothing happens at all during the activation stage, you know your yeast is no longer alive and cannot be used for rising bread.
The second function is actually to bring out the flavor of the rye bread. By scaling the rye bread, all that heat helps to wake up and get out all the flavors of the rye. You can think of it like making tea. Put your tea bag in room temperature water and let it sit for 3 minutes. Then, put a different tea bag in hot water and let it sit for 3 minutes. Which gets more flavor? P.S-the answer is the hot water tea! In addition to that, the longer the rye sits, the more time there is for the flavors to come out-even as the initially boiling water begins to cool to room temperature. So, without water, this recipe would really be in trouble!
White Sugar: Although molasses is the main sweetener in our recipe, we like to use white sugar when it comes to activating our yeast. It’s a habit that has never let us down! The white sugar gives our yeast microorganisms something to munch on, which helps with ensuring enough of a rise.
Molasses: Molasses is key for both flavor and appearance in this brown bread recipe! We like to make it extra sweet by adding 6 whole tablespoons of molasses! You can definitely taste the molasses when you are eating one of these rolls. Not only that, but so much molasses adds a brown color to our bread without having to use any food coloring, coffee powder, or cocoa powder-which are entirely unnecessary ingredients to get the flavor we want. Finally, molasses is a liquid sweetener. This adds more moisture to our bread, which is important because rye flour often requires more liquid than bread flour to get the optimal texture.
Rye Flour: This flour might not be common in your pantry, but we highly recommend getting it! As important as the molasses is for the flavor of this recipe, we believe there is just something special about rye. If you haven’t had it before, it’s nutty and not too strong. If you don’t have access to rye flour, we actually recommend switching out the rye flour for whole wheat flour. The flavor may be a bit different, but both of these rolls are great!
Bread Flour: If rye flour is so good, why not do 100% rye and skip the bread flour altogether? Even though rye flour has a distinct flavor and a denser texture, there can be too much of a good thing. Without bread flour to help out in the gluten department, we would get bread that is far too dense to be enjoyable. In addition to that, the bread would be a lot drier since rye wants more liquid than wheat based flours (such as bread flour) do! Rye flour does have gluten, just not enough to be on its own. All-purpose flour is an acceptable substitute, but you’ll need to knead the bread for a longer time and add around 10 minutes to each yeast rising time.
Salt: Nothing like a little salt to make a great bread! Salt affects the rise and the texture of the overall product, even though you’d think all it does is affect flavor! It also helps to balance the sweetness of the molasses so that these rolls are dinner rolls, not donuts.
Milk: The milk in this recipe also helps activate the gluten in our bread and initially scald the rye, but it also serves another purpose. Milk adds a bit more moisture and softness to the final product, which keeps us from having dry and tough bread. Use whatever percentage of milk you have on hand, from skim to whole. With that being said, you’ll get the most moisture and softness by using whole milk.
Butter: Yet again, Cook Your Pantry Out adds butter to a recipe. No surprises here! It contributes extra richness, extra flavor, and adds liquid that helps our final product have a great texture. We personally use unsalted butter.
Oats: Yup, oats! Even though we don’t mix oats into our dough, they make the perfect topping on these brown bread rye rolls. They’re cute-helping you “eat with your eyes” first. You can use quick oats or regular oats on top. We use regular oats. If you don’t have oats on hand, feel free to skip them for this recipe.
KEY INFORMATION:
Why Do You Scald Rye Flour? Scalding rye flour is not a baking habit that stuck on for generations (looking at you, dotting pies with butter), but an actually important step of baking with rye flour! Rye flour has a lot of flavor, but it needs heat and time to be fully unlocked. Like a bag of tea, scaldingly hot water brings out the flavor of rye. As it sits for 24 hours, more flavor develops! If you are to bake with rye flour without scalding it, what you make will have noticeably less flavor.
Why Do You Press Down Bread After It Rises? After all the rise time it may seem counterintuitive to press out all that air! However, pressing down bread after it rises allows for a stronger, more stable bread to form. Afterwards, the bread rises again. It comes back stronger, so to say!
Why Does Bread Rise So Long? Bread rises thanks to a little microorganism called yeast! Yeast takes time to react with the sweet ingredients in a bread recipe and release gas, which allows the bread to rise. You cannot rush this process except by using instant yeast, which is smaller in size than traditional active dry yeast. Time is the only answer for yeast to be able to fully do its job.
What Goes With Brown Bread Rye Rolls? There are many good meals that pair well with brown bread rolls! Try out pan-fried fish with dill cucumber salad. Otherwise, make a creamy wild rice soup or a simple lamb soup. Add a bit of carbs to any meal that is super light, such as when you have just a salad as your meal. Finally, pair brown bread rolls with roasted chicken or turkey for the ultimate family comfort dinner.

Ingredients
Method
- Bring 1 cup of water and 1 cup of milk to a boil.
- To a large bowl, add the rye flour, boiling water and milk, and salt. Mix and let it rest for 24 hours. Do so by allowing it to rest at room temperature for 1 hour, then putting it in the refrigerator, Take it out about one hour before working with the yeast to bring the dough to room temperature.1
- After the 24 hour period, prepare the yeasted dough: start by combining the active dry yeast, remaining 1/4 cup of water (warm but not hot), and white sugar in a small bowl. Allow 5 minutes for the yeast to activate. If there is no visible change to the yeast, throw out the yeast mixture and try again with fresh yeast.
- Preheat the oven to 375 F / 190 C.
- Add the yeast mixture and all remaining ingredients (except the oats) to the large bowl with the rye flour.
- Knead until the dough can pass the "golf ball"2 test. The dough will be sticky-that's ok!
- Cover the bowl and allow it to rise on a warm surface3 for 3 hours, lightly pressing the dough down at the halfway mark to release air.
- Once the dough has finished rising, shape the dough into 12 rolls: divide the dough into 12 equal parts. Then, grab the edges of each roll and bring the edges to the middle of the roll. Flip the roll over and pat the bottom against the counter. Rotate the roll in your hands with the bottom still touching the counter surface to form a spherical roll. Put 6 rolls on each standard sized baking sheet.
- Add oats as desired on top of each roll. Cover the rolls and allow them to rise on a warm surface for one hour.
- Bake the rolls at 375 F for 25 minutes. After 25 minutes, make sure to knock on a roll. If it sounds hollow, it is ready. If the rolls are underbaked, bake for another 5 minutes.
- Enjoy!
Leave a Reply